In this tutorial, we will be looking at how to add an editor to your Django app which will ease your content creation process. In this tutorial, we will be using two python libraries, ckeditor and django. To install these libraries run the commands below.
pip3 install django

pip3 install django-ckeditor
To begin, first, run the commands below to create a Django project.
django-admin startproject ckedThe command above creates a folder called cked . Cd into the cked and then run the command below to create an app that will bear our editor.
python3 manage.py startapp eldTo begin let’s first register our app in the settings.py file in the root project. In the installed apps list add the following code.
INSTALLED_APPS = [
    'django.contrib.admin',
    'django.contrib.auth',
    'django.contrib.contenttypes',
    'django.contrib.sessions',
    'django.contrib.messages',
    'django.contrib.staticfiles',
    'eld.apps.EldConfig',
    'ckeditor',
]
Now let’s register routes for our app in the urls.py file. Add the code below inside the file.
from django.contrib import admin
from django.urls import path,include

urlpatterns = [
    path('admin/', admin.site.urls),
    path('',include('eld.urls')),

]
Now in the eld folder , let’s create our models. In the models.py file add the following.
from django.db import models
from ckeditor.fields import RichTextField

class Post(models.Model):
    body = RichTextField(blank=True,null=True)
Now let’s create our form which will be used to get the data. In the eld folder create a file called forms.py inside it add the code below.
from . models import Post
from django import forms


class PostForm(forms.ModelForm):
    class Meta:
        model = Post
        fields = "__all__"
Let’s now proceed to create our views. In the views.py file add the following.
from django.shortcuts import render
from django.views.generic import CreateView
from . models import Post


class PostCreate(CreateView):
    model = Post
    success_url = '/'
    template_name = 'eld/add.html'
    fields = ['body']
The code above creates a view for the post creation which we will implement an editor for instead of a normal textarea. Now let’s create routes for our app. In the urls.py add the following.
from . import views
from django.urls import path


urlpatterns = [
    path('add',views.PostCreate.as_view(), name="add"),
]
Now let’s create a template for our app. In the eld folder, create a folder called templates, inside the templates create a file called index.html. Inside the index.html file add the following code.
{% load static %}
<!DOCTYPE html>
<html lang="en">
  <head>
    <meta charset="utf-8">
    <meta name="viewport" content="width=device-width, initial-scale=1, shrink-to-fit=no">
    <title>note app</title>
    <!-- Bootstrap core CSS -->
    <link href="{% static 'css/bootstrap.min.css' %}" rel="stylesheet">
    <link href="{% static 'css/style.css' %}" rel="stylesheet">
  </head>
  <body>

    <!-- Navigation -->
    <nav class="navbar navbar-expand-lg navbar-dark bg-dark">
      <div class="container">
        <a class="navbar-brand" href="#">Notepad</a>
        <button class="navbar-toggler" type="button" data-toggle="collapse" data-target="#navbarResponsive" aria-controls="navbarResponsive" aria-expanded="false" aria-label="Toggle navigation">
          <span class="navbar-toggler-icon"></span>
        </button>
      </div>
    </nav>

    <form method="POST", enctype="multipart/form-data">
        {% csrf_token %}
        {{ form.as_p }}
        {{ form.media}}
        <input type="submit">
    </form>

    <!-- Bootstrap core JavaScript -->
    <script src="{% static 'js/jquery.min.js' %}"></script>
    <script src="{% static 'js/bootstrap.min.js' %}"></script>
  </body>
</html>
Now our app is ready. To run our app we first need to create our database. To do so run the command below.
python3 manage.py makemigrationsAfter running the command above, run the command below.
python3 manage.py migrateNow run the command below to run the server.
python3 manage.py runserverThe above command will now open a server accessible at the address below.
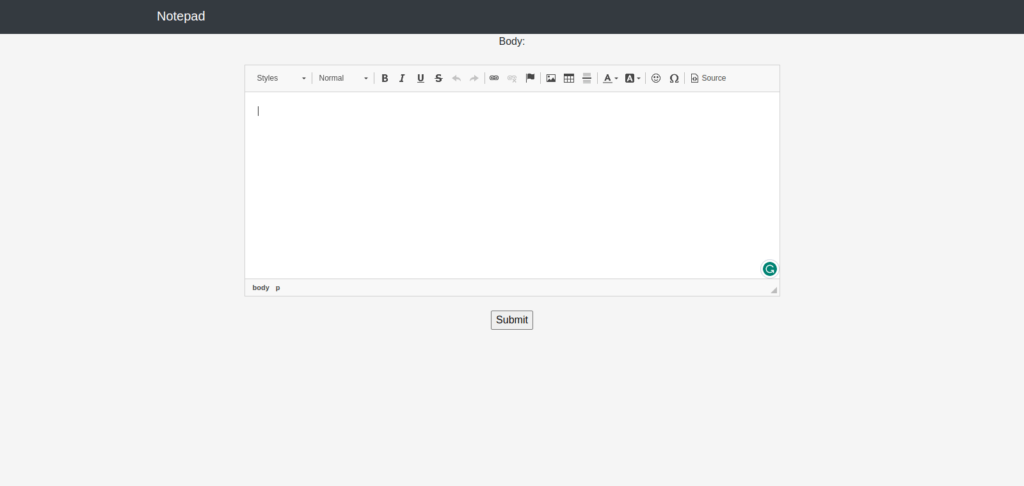
http://127.0.0.1:8000/addOpen your browser at the address above and here is your editor.

There you have it.Thanks for reading.


