Introduction
A port scanner is a tool used to test the security of a network and also troubleshoot network issues and also map networks. In this tutorial, we will be looking at how to implement a simple port scanner.
Install modules
To begin we will first need to install tqdm which will be used to make progress bars. To do so run the command below.
pip3 install tqdmCreate app
Create an app main.py and import these modules as shown below.
import socket
import concurrent.futures
from tqdm import tqdm
Now let’s create a class and create a scan functionality to scan through the ports in a certain ip address. We will then create progress bar to keep track of the time used in scanning the ports.
class PortScanner:
    def __init__(self, target, start_port, end_port):
        self.target = target
        self.start_port = start_port
        self.end_port = end_port
        self.open_ports = []

    def scan_port(self, port):
        try:
            sock = socket.socket(socket.AF_INET, socket.SOCK_STREAM)
            sock.settimeout(0.5)
            sock.connect((self.target, port))
            self.open_ports.append(port)
            sock.close()
        except:
            pass

    def scan(self):
        with concurrent.futures.ThreadPoolExecutor(max_workers=50) as executor:
            futures = []
            for port in range(self.start_port, self.end_port + 1):
                futures.append(executor.submit(self.scan_port, port))

            for future in tqdm(concurrent.futures.as_completed(futures), total=len(futures)):
                pass
Let’s now finish by creating a main function where we prompt the user for an address and the range of the ports to be scanned.
if __name__ == '__main__':
    target = input("Enter target IP: ")
    start_port = int(input("Enter starting port number: "))
    end_port = int(input("Enter ending port number: "))

    scanner = PortScanner(target, start_port, end_port)
    scanner.scan()

    print("Open ports:", scanner.open_ports)
Run
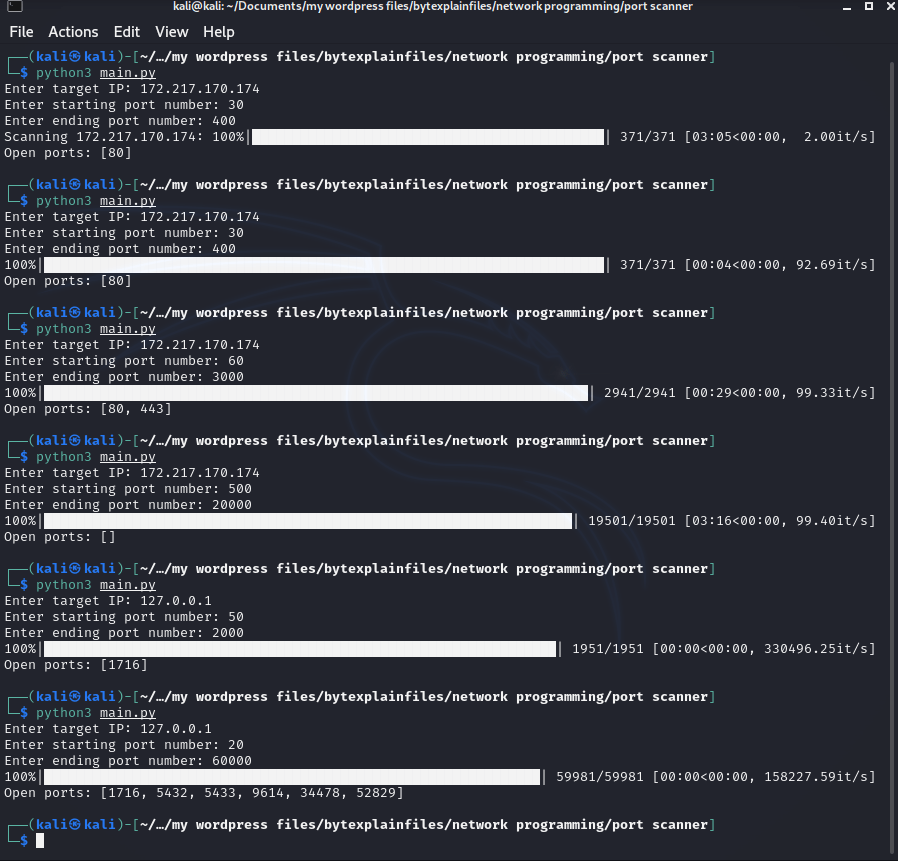
Now open your terminal and run the script above to scan the ports. Here is an example as shown below.

There you have it, Thanks for reading. Happy Tutorials.


